In 4 days, I leave on a 15-day trek through the Himalayas. In this article, I thought I’d write up some of the planning and preparation that we have had to do for this trip.
Deciding on a Trek
We started planning this trip about 10 months ago. Trekking the Himalayas has always been one of my goals. It wasn’t enough to just look at the mountains from afar, I wanted to be surrounded by them for days. A multi-day trek seemed to be the best option, short of summiting a peak.
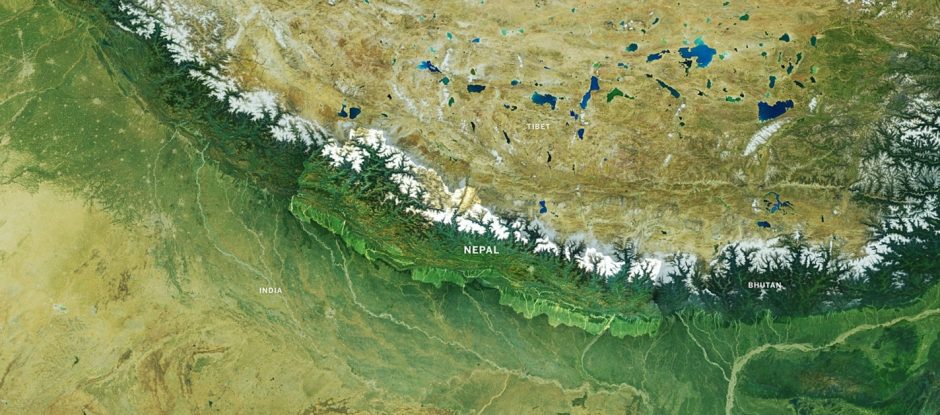
We spent a lot of time looking at various treks in the region. There are no shortage of options. The Himalayas stretches across 5 countries — India, China, Pakistan, Nepal, Bhutan — but the majority of the treks exist in Nepal and Bhutan. Here’s a rough trek map from kimkim:

Out of these, Bhutan is significantly more expensive. Tourists need to pay $250 USD per day to trek there. On the other hand, this makes Bhutan less travelled than Nepal, and makes the treks more authentic.
Nepal is the gateway to the Himalayas and there are dozens of treks to choose from. The primary factors are length, price, and difficulty. For this post, I’ll be focussing on treks that are moderate to challenging, and greater than 8 days in duration. Those are the ones that I focused on. Most of the treks in Nepal can be broken up into Base Camp treks, and Circuit Treks.
- A Base Camp Trek involves hiking to the Base Camp of a mountain and back.
- A Circuit Trek involves hiking in a bit of a loop, while steadily gaining altitude.
The most popular Base Camp Trek is the Everest Base Camp (EBC) and the most popular Circuit Trek is the Annapurna Circuit. Even though Everest was very alluring to me, I didn’t like the idea of walking back in the same direction that I walked up. I wanted to see new things everyday. Therefore, we focussed on the circuit treks.
The Annapurna Circuit is known as “the quintessential Himalayas trek”, but it does have a major problem: tourists. Most tourists choose this trek due to its popularity and as a result, significant portions of the trek have become urbanized. This has partially ruined the essence of the trek.

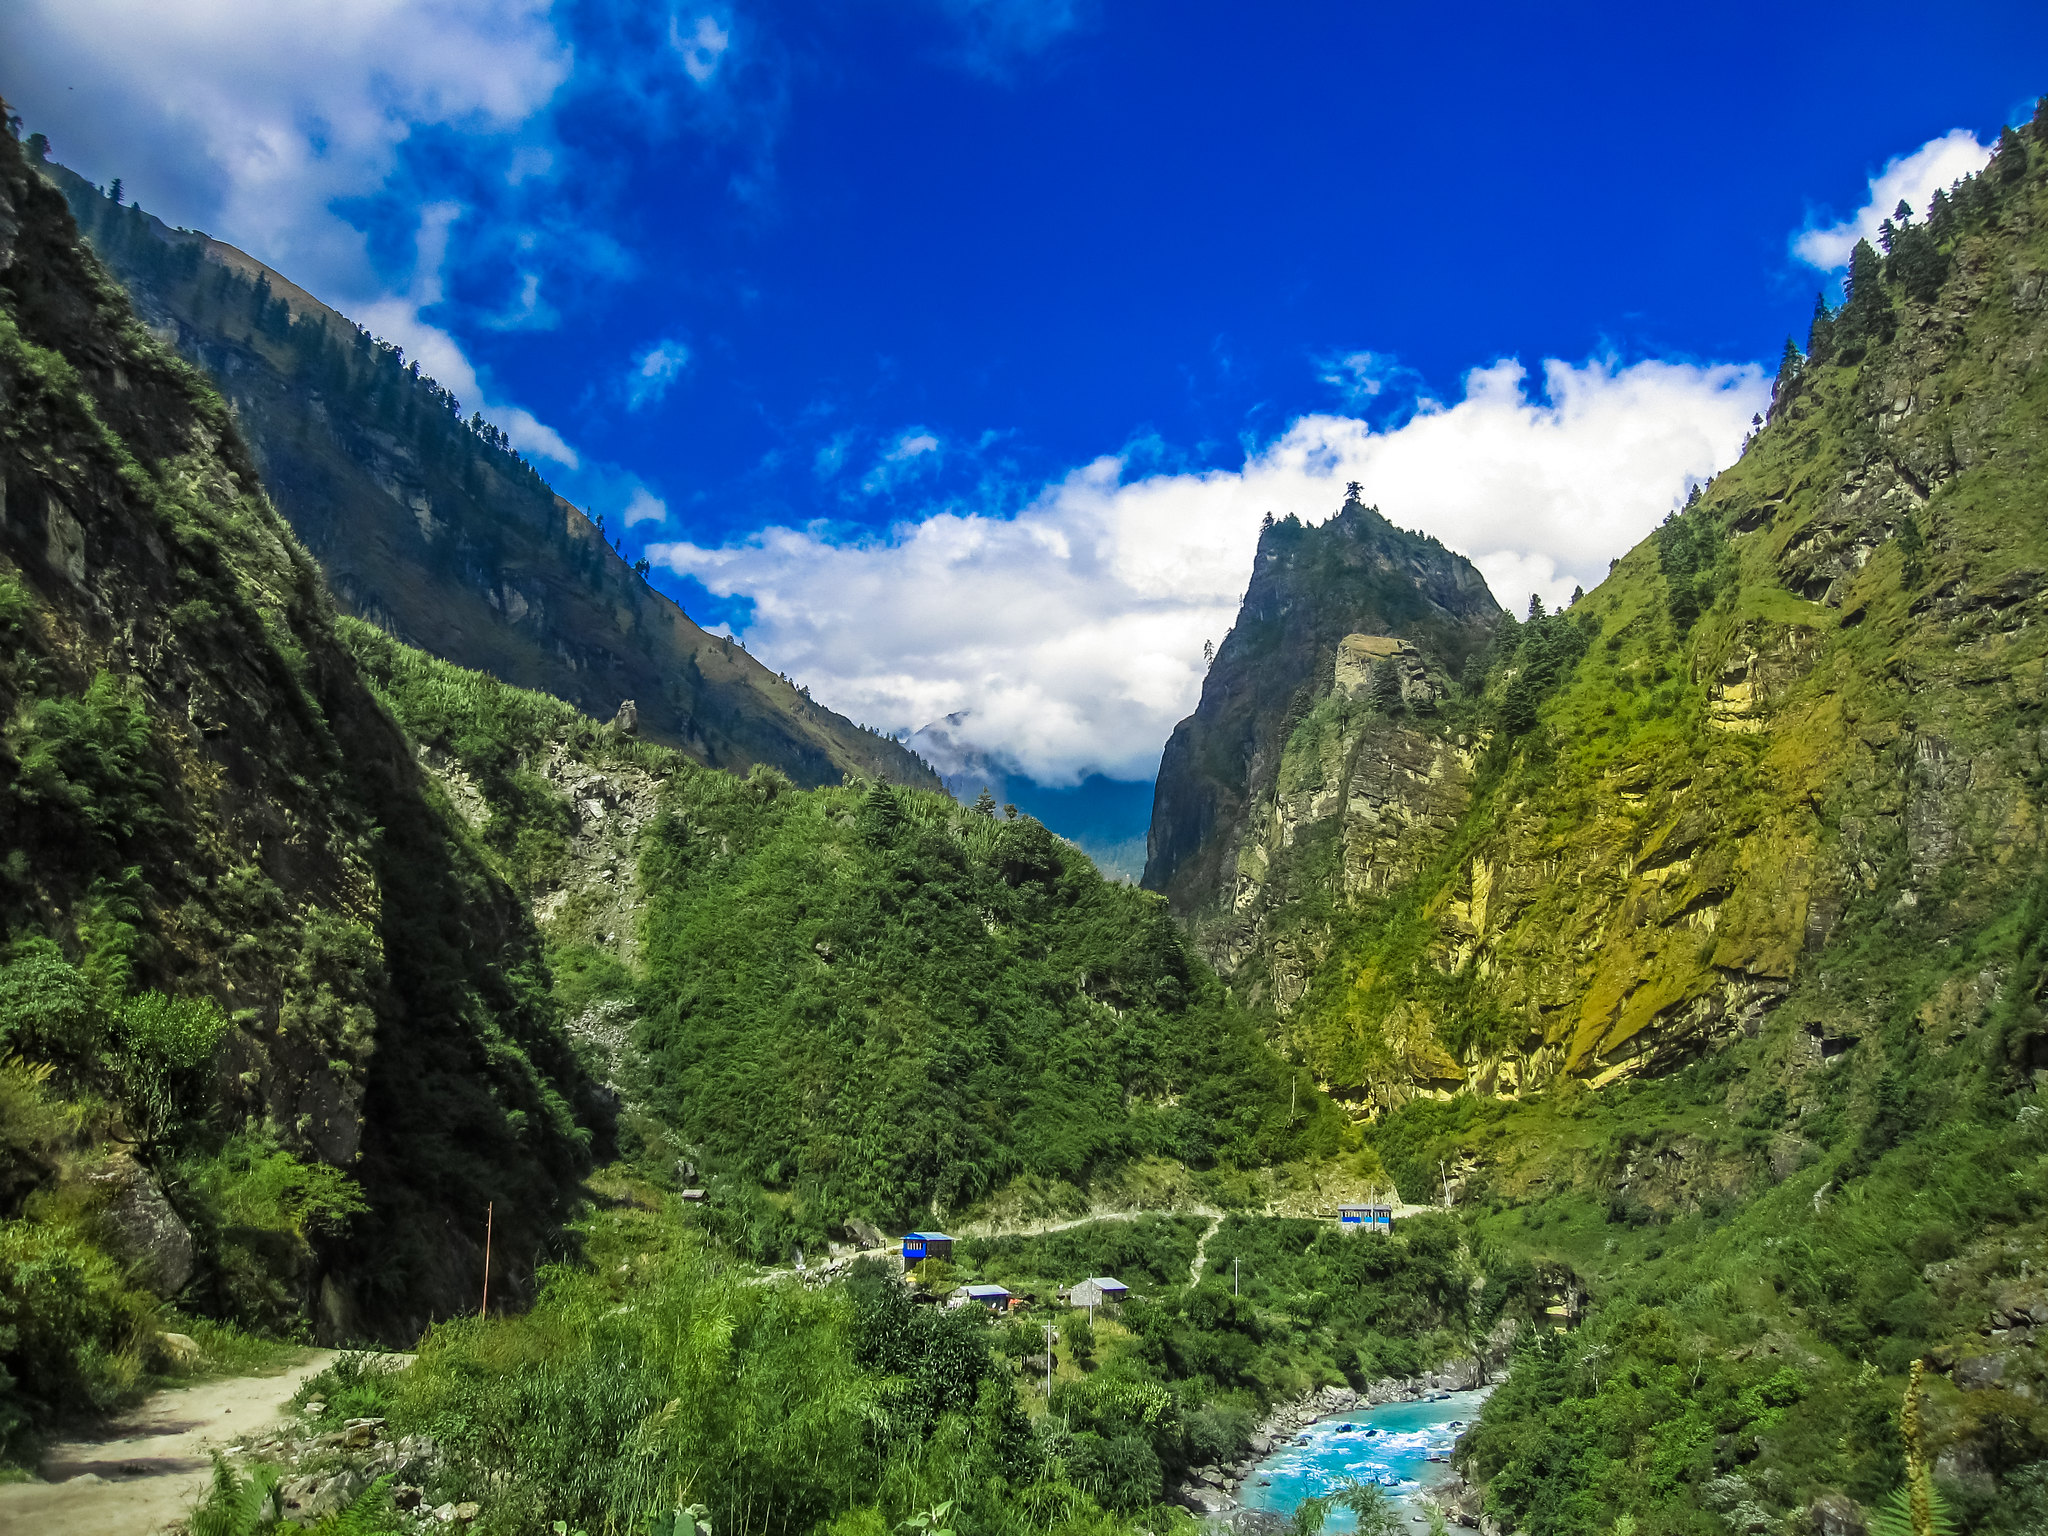
As a result, we ended up going with the Manaslu Circuit Trek. Known as the “new Annapurna Circuit”, this trek gets 1/100th the number of visitors, is in a protected ecological region, and preserves the essence of the Himalayas.
Here’s what kimkim says:
The Manaslu Circuit trek is far less crowded than other classic treks in Nepal and remains a true remote adventure, despite its increasing in popularity since teahouses were built here in 2010. The Manaslu trek features all the great aspects of a classic trek in Nepal: epic scenery, spectacular suspension bridge crossings and a 5100m (17,000-ft.) Himalayan pass.
Here’s a trail map of the Manaslu Circuit Trek:

Teahouse Trekking
Most of the treks in Nepal — including the Manaslu Circuit — are teahouse treks. This means that hikers do not need to pack camping gear, as you will not stay in tents. Instead, they make a nightly pitstop in small villages where you sleep in teahouses. They have basic accommodations and usually charge extra for access to electricity, showers, and food.

Choosing a Trekking Company
A quick search on Tripadvisor shows that there are about a 1,000 trekking companies that operate in Nepal. Our primary criteria for a trekking company were:
- Trustworthy and Reliable: Good reviews on TripAdvisor are a good metric for this.
- Not overly expensive: We had a rough budget of $1300 USD per person for 15 days.
- Good to the environment and locals: We wanted to choose a local company instead of going with large multinationals.
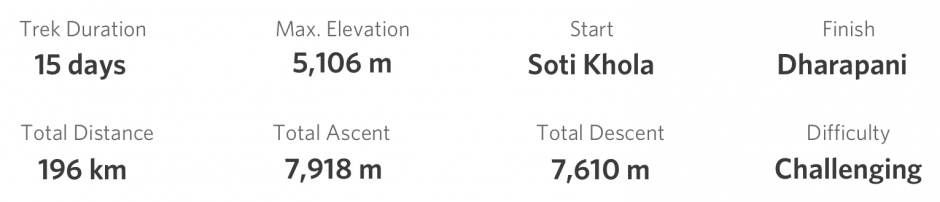
- Access to Larkya La Pass: We wanted to climb the Larkya La Pass at 5,000 metres.
Although the companies vary, the trekking route is largely the same. The teahouses you stay at every night is also similar. To help with our decision, we emailed each of the top 30 trekking companies on TripAdvisor who offer the Manaslu Circuit Trek.
Here’s an email that I sent:
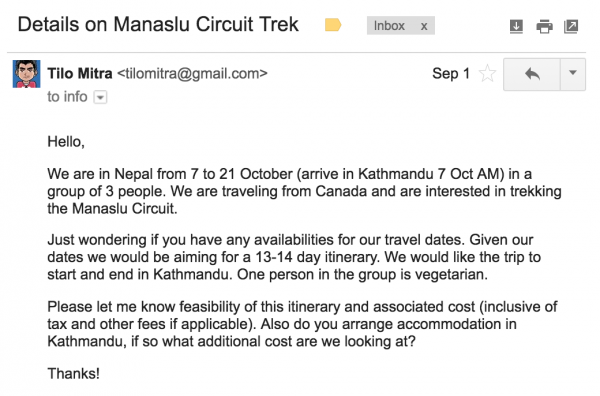
After receiving replies from 20+ trekking companies, we were able to drill down into a few that we really liked. This was done based on the itineraries they provided, the professionalism of the tour guide, the price, and more.
Finally, we decided to go with Nepal Eco Adventure, who are listed 3rd on TripAdvisor out of 980+ trekking companies.
Preparations
We decided to go to the Himalayas in October. This is generally considered the best time to go as it is right after the monsoon season, and it’s still warm enough. It’s also the busiest time in the mountains.
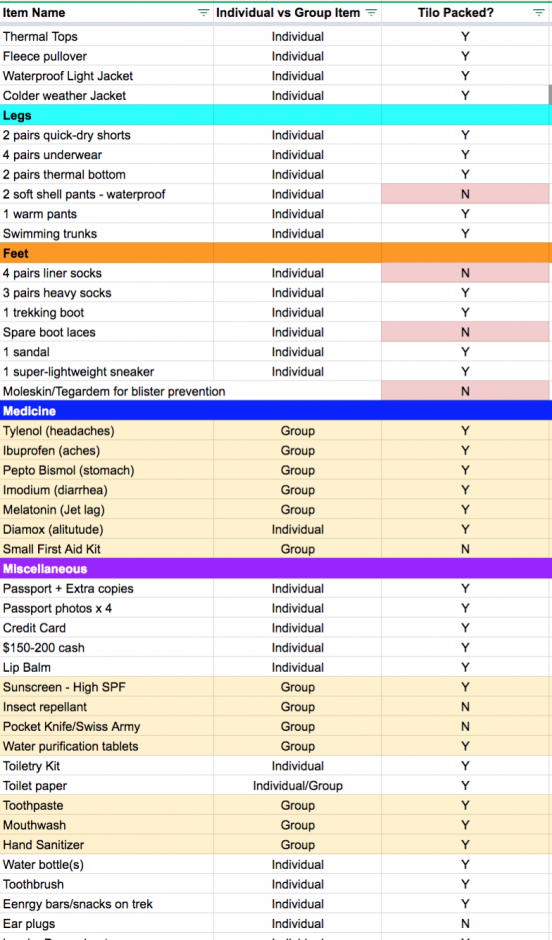
We created an Excel sheet to track all the items that we needed to bring. As the trek was for 15-days, it was important to pack light. This was done by minimizing cotton and opting for polyester water-resistant clothing. Some useful items on this list include Campsuds, water purification tablets, packing cubes and quick-drying towels.
All of this will be packed in my trusty MEC 65L Supercontinent Backpack. This is the 3rd trip I’m taking it on. I love the accessible daypack and the fact that the backpack opens up like a suitcase, as opposed to being top-loaded.
Camera Gear
Naturally, I’ll be taking a lot of photos and videos on this trip. Here’s my camera gear for the trip.
- Sony Alpha a7 Mirrorless: This is my standard camera that goes with me on every trek. This time, I’m bringing two additional batteries that can be charged via USB. Due to space and the amount of walking that I’ll be doing, I’ll only bring the prime lens. No time for lens swapping. I’ll also bring a polarizer for day time shots.
- iPhone 8 Plus: My iPhone will primarily be used for shooting videos. Being able to take 4K videos at 60 frames per second in such a small package is amazing. I aim to put these videos together into a montage afterwards. Of course, it also has one of the best smartphone cameras for daytime shooting.
- Anker Powercore 2 Charger: Charging these devices will be tricky and I want to hand them over to strangers. Therefore, I’ll be using an Anker 20,000 mAh charger to charge both my camera batteries and my iPhone.